
AutoCal Instructions
- Each AutoCal ships with licensing for one vehicle only. Over 200 vehicles can be tuned with each device, however additional tuning service will be needed. Please contact us for details.
- We will do our best to provide tune files as quickly as possible.
- Periodically, software and hardware (firmware) updates may be necessary for the best user experience. We encourage installing the EFILive Auto Update utility to be able to stay on top of this easily.
- For AutoCal troubleshooting, please send us an email through our Contact Us page or call us Mon-Fri 8am - 4pm PST and we would be happy to help. We can also provide remote desktop assistance, as needed.


Click the "Check Firmware" button on the Scan and Tune home screen. If a firmware update is needed, the EFILive Control Panel will open up and you will be prompted with an "Update Firmware" button. Click it to proceed.

Each vehicle type uses a different set of configuration options that we have defined for data collection. Please find your vehicle type below and click on the download icon immediately next to it. A single "Quick Setup" file will download to your computer. Open that file and click on the "Program Quick Setup" button to update your AutoCal Configuration.

Vehicle List
For all other vehicles or if you are not sure which configuration to utilize, please Contact Us. We have configurations available and will be happy to help.
Your AutoCal is now ready to retrieve your factory tune file(s) and collect data for your tune.
Data logging should be completed by all AutoCal users except those that need an initial tune to be able to get the vehicle drivable. All AutoCal users must provide their OEM Tune file(s).
First Generation AutoCal Users:
- Connect your AutoCal to the provided OBD-II cable and locate the OBD-II port under your dash. Connect the cable to the OBD-II port and observe that the unit powers up. If no power is found, turn your ignition key to run and observe again. If still no power is found, check your cigarette lighter fuse in the underhood fuse panel.
- Start your vehicle.
- Using the AutoCal's Next and Prev buttons, navigate to the "Record Data" option and press Ok. (If you get a $0280 or $0281 error, please click here or see below for error explanation)
- Using the Next and Prev buttons, navigate to the controller type that corresponds to your vehicle type and press Ok to begin data-logging. This will start the recording. In nearly all cases, the first option to appear is the correct one to choose. Do NOT use any option related to "MISFIRE" or "COMPAT" or anything other than the first option shown when data-logging unless explicitly requested. If the log file begins recording immediately, then there is only one option available.
Please see below for controller types if you are unsure.- 2014+ vehicles will use the first option, typically 2014+ AutoTrans
- 2007 NBS - 2013 vehicles will use the E38 6spd option or E38 4 spd, whichever applies to your vehicle
- 1999+ LS1 vehicles, 1999-2006 trucks will use Gen-III 99-06
- 1998-2000 Old Body Style 4.3L, 5.0L, 5.7L and 7.4L Trucks will use Gen-III 99-06
- 2011+ 2500HD 6.0L Trucks will use E78 6spd 2011+
- After you are finished collecting your log, with the engine still running, hit the Prev button until you see Exit and then hit OK. It should say Saving and then Saved.
- You can turn the engine off.
(Note: For new tunes, we will also need the stock tune file(s) so please keep in mind to proceed to the Tune File Retrieval step.)
- Connect your AutoCal to the provided OBD-II cable and locate the OBD-II port under your dash. Connect the cable to the OBD-II port and observe that the unit powers up. If no power is found, turn your ignition key to run and observe again. If still no power is found, check your cigarette lighter fuse in the underhood fuse panel.
- Start your vehicle.
- Press the Check Mark button to accept the user agreement. Navigate to the Scan Tool option using the arrow keypad and press the Check Mark button.
- Navigate to the F2: Data Logging option and press the Check Mark button. Select the F1: Record Data option and press the Check Mark button. You will then be prompted to select the controller type. In nearly all cases, the first option to appear is the correct one to choose. Do NOT use any option related to "MISFIRE" or "COMPAT" or anything other than the first option shown when data-logging unless explicitly requested. After selecting your controller type, the recording will begin. Please see below for controller types if you are unsure.
- 2014+ vehicles will use the first option, typically 2014+ AutoTrans
- 2007 NBS - 2013 vehicles will use the E38 6spd option or E38 4 spd, whichever applies to your vehicle
- 1999+ LS1 vehicles, 1999-2006 trucks will use Gen-III 99-06
- 1998-2000 Old Body Style 4.3L, 5.0L, 5.7L and 7.4L Trucks will use Gen-III 99-06
- 2011+ 2500HD 6.0L Trucks will use E78 6spd 2011+
- After you are finished collecting your log, with the engine still running, press the X button. This will save your data log and display the resulting file name.
- You can turn the engine off.
(Note: For new tunes, we will also need the stock tune file(s) so please keep in mind to proceed to the Tune File Retrieval step.)
To Pause your recording, press the Ok button at any time. To resume, press the Ok button again. (This option is not recommend. It would be better to just finish the log and save it.
To Monitor parameters being recorded, press the Next and Prev buttons to scroll through them
To Save your log file, press the Prev button until you reach the Exit screen and then press Ok. It will say Saving and then Saved. Once you see Saved, this confirms that the log file has completed.
Note: The AutoCal has 6MB of onboard memory. If you have multiple tune files loaded on the device, you may end up with limited space available for log file creation. You may free up this space by navigating to the "Format File Sys" option or by using the EFILive Explorer (outlined in the file copying section).
We do not advise you to monitor any parameters directly while driving, log files may be viewed on your PC using the EFILive Scan tool, downloadable from www.efilive.com (V7.5.x).
-
For First Generation AutoCal Users:
- Connect your AutoCal to the provided OBD-II cable and locate the OBD-II port under your dash. Connect the cable to the OBD-II port and observe that the unit powers up. If no power is found, turn your ignition key to run and observe again. If still no power is found, check your cigarette lighter fuse in the underhood fuse panel.
- Turn your ignition key to the run position, but do not start the vehicle. Generally, this is two clicks forward. On vehicles with push-button start, you'll need to press the Acc (Accessory) button with your foot off of the brake pedal.
- Using the AutoCal's Next and Prev buttons, navigate to the "Read" option corresponding to your vehicles controller type and press Ok to begin retrieving the calibration file (If you get an $0280 or $0281 error, please click here or see below for error explanation). If your Read 1 option is L31, LS1A or LS1B or you have a manual transmission, then you have only one file to read. All others will need to perform both the Read 1 and Read 2 functions. Exceptions to this rule are all Allison equipped vehicles will need to perform the Read 2 option and all 2017 8 Speed vehicles will only perform the Read 1 option.
- Follow all on-screen instructions pertaining to ignition, percentage completed and wait times to ensure a successful read.
-
For AutoCal V3 Users:
- Connect your AutoCal to the provided OBD-II cable and locate the OBD-II port under your dash. Connect the cable to the OBD-II port and observe that the unit powers up. If no power is found, turn your ignition key to run and observe again. If still no power is found, check your cigarette lighter fuse in the underhood fuse panel.
- Turn your ignition key to the run position, but do not start the vehicle. Generally, this is two clicks forward. On vehicles with push-button start, you'll need to press the Acc (Accessory) button with your foot off of the brake pedal.
- Using the arrow keypad, navigate to the Tune tool and press the Check Mark button. Select the F1: Tuning option and then select the F1: Read tune option.
- You will be prompted to select your controller type(s). Select the appropriate controller(s) and then press the Check Mark button to start the tune file retrieval process. If your option is Vortec 98-00, Gen-III 99-06 or you have a manual transmission, you will only have one file to read. All other vehicles will also need to download the transmission file using the 4 speed, 6 speed or 8 speed option. Exceptions to this rule are all Allison equipped vehicles. They will need to perform the Allison Trans option as well and all 2017+ 8 Speed vehicles will only require an engine read.
Config contains configuration files copied to the device to support controller read and flash functions.
Menu contains AutoCal V3 menu configuration files.
Scan corresponds to all logged data that has been created and saved to your AutoCal device.
Trace contains files created by the Save Trace File operation. Files in this folder will typically be provided to EFILive to assist with support requests.
Tune corresponds to all tune files that can be programmed to the vehicle via the 5 programming slots in the onboard menu.
Read corresponds to all tune files that have been retrieved from a vehicle using AutoCal's read function.
The upper window panes represent your PC's file structure, folders on the left, files on the right, and the lower pane represents the AutoCal.
File operations within EFILive Explorer operate just as they do within Windows and allow for easy drag-and-drop copying. In the upper pane, navigate to your Tuning Files folder and drag the files to and from the AutoCal that you wish to move.
Note: Some users have encountered drag-drop errors using Windows 7. If you find that you cannot drag the files to be installed, there is another option. Right click on the file(s) to be copied to the AutoCal and select "Copy", then right click in the AutoCal memory pane and select "Paste". Repeat this for all desired files.
- Connect your AutoCal to your PC via the provided USB cable and open the EFILive Explorer program.
- Open the EFILive Explorer program
- To transfer the log file, click on the Scan folder. Copy and paste, or drag and drop, the file to your Tuning Files folder in the upper pane.
- To transfer the tune file(s), click on the Read folder. Copy and paste, or drag and drop, the file(s) to your Tuning Files folder in the upper pane.
Once those files are saved to your computer, please email them to us using the following instructions.
Note: The "F4: Config Files" tab contains all files that AutoCal uses for vehicle connection and tune file retrieval. This memory is populated via the EFILive Scan and Tune program discussed previously and should not be altered.
Within the body of the email, please include the following information:
- Vehicle Modifications - please provide manufacturer model/part numbers when possible.
- Approximate Vehicle Mileage
- Specific Areas of Concern - example: transmission slippage, rough idle, poor mileage, etc.
- Any Desired Tune Changes - example: AFM delete, Sport shift patterns, economy shift patterns, etc
Attach the desired files to the email and make note of any special situations regarding the logging conditions. We will analyze the log file(s) and either reply back with a request for action or confirm your desired tune changes and place you on the to do list.
If you have a 2007 or newer vehicle and have ever used a Diablosport product at any time on your vehicle, even if it is not currently installed, please specify that when sending your tune files in. Very often, there are trace components of the tune left in that can cause your ECM to left blank when flashing, requiring additional work on our end and a no start condition on yours.
Once completed, we will email the tune files for you to copy to your AutoCal and then install.
And finally, after you have received your completed tune files, you will want to follow the steps below to program them to your vehicle.
- Please download and save the QS file to your computer from your email.
- Plug your AutoCal into your PC.
- Double click on the QS file. Once opened, you will be presented with the Quick Setup screen.
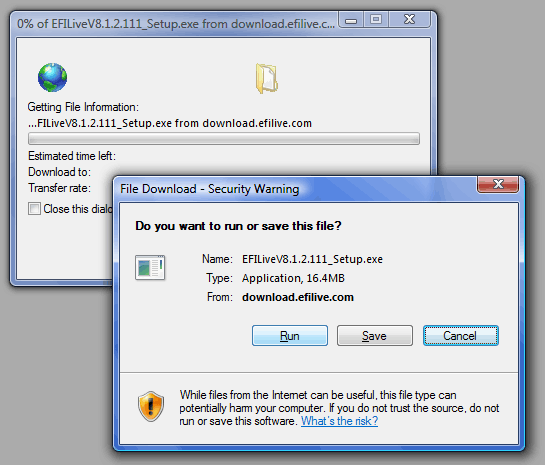
- Click the Program Quick Setup button. This will load the files to your AutoCal. If you do not see this button, please ensure the window is fully maximized. (If you run into a $0194 error, please ensure all files are deleted out of the Read and Scan folders in the EFILive Explorer program) (Example)
- Take the AutoCal and OBD2 cable out to your vehicle and plug them in.
- Turn the key to the run position but do not start the vehicle.
-
First Generation AutoCal:
Navigate to the Prog options corresponding to your vehicle's controller(s). Each controller will need to be programmed separately. The file name will be displayed under the Prog function. Do not use the FULL option unless specified by us.AutoCal V3:
Navigate to the Tune Tool option. Select F1: Tuning and then select F2: Program Calibration. - If your tune files have "ECM" and "TCM" in their names, you will want to program one ECM and one TCM file to the truck. For example, load PROG 1 89-87OctECM and then load PROG 3 ModTCM when equipped.
- Press Ok to begin the programming process (If you get an $0280 or $0281 error, please click here or see below for error explanation).
- If the vehicle has not yet been programmed, you will be requested to license the vehicle to the AutoCal. This will permanently lock the vehicle's controller to one of the available AutoCal licenses.
- Once programming has commenced, a status indicator will be displayed. Do not disrupt the programming process by touching the ignition key or disconnecting the cable until programming has completed.
- Upon completion, the AutoCal will notify you to remove your ignition key and will present you with a timer indicating the length of time you should have the key removed. Repeat the process as needed for a secondary controller (eg transmission). Do not install the stock tune file(s) after loading the custom tune file(s). That will override the custom tune files and put your vehicle back to factory settings.
- Your tune files have now been installed and your vehicle is ready to drive. If requested: Please collect a follow-up log file to be sent in and analyzed. Do NOT use any option related to "MISFIRE" or "COMPAT" or anything other than the first option shown when data-logging unless explicitly requested.
- "ECM", "TCM" - Refer to Engine Control Module and Transmission Control Module respectively. Those vehicles with separate computers for each will have separate tune files for each which must be programmed independently.
- StockTune, StockECM, StockTCM - All refer to OEM factory tune files. To revert to factory configuration, program all files with "Stock" in the name onto the vehicle.
- 89-87OctECM - Engine computer tune designed for optimal use with 89 or in some cases 87 octane as well.
- 91+OctECM - Engine computer tune designed for 92-93 octane with acceptable operation on 91 octane as well.
- ModTCM - Transmission computer tune designed for all around shift patterns and response improvement. Tow/haul shift functions will remain unaltered on truck platforms.
- SportTCM - Transmission computer tune designed for more aggressive shift patterns and response. On 4 speed trucks, this is primarly accomplished on the tow/haul option only.
- EconTCM - Transmission computer tune designed for more economical shift patterns. Throttle response may suffer as a result.
- 89-87OctTune, 91+OctTune, ModTune - Vehicles with a single engine/transmission computer with standard shift pressure/response improvements. Tow/haul shift functions will remain unaltered on truck platforms.
- 89-87OctSport, 91+OctSport, ModSport - Vehicles with a single engine/transmission computer with more aggressive shift pressure/response improvements. On truck platforms, this will take place of the tow/haul shift pattern.
Error code of $0194 while copying files to the AutoCal indicates that the internal memory is full. With the 6MB limit, you may not be able to store all of the files pertaining to your vehicle on the device at one time. Delete all logged data and try again, copying only the files immediately necessary.
Error code of $050B indicates that the AutoCal's configuration is not correct for the file needing to be flashed. Please update the firmware on the AutoCal using the Initial Setup Instructions and then re-load the QS file using the Configuring AutoCal step.
Error code of $0185 while recording data or reading tunes from the vehicle often indicates that the AutoCal's internal memory structure needs to be re-built. To do this, format the device using the "Format File Sys" option on the AutoCal menu.
Error code of $0536 while attempting to program indicates that the tune file has not been registered by our equipment for your device. This can occur is you are trying to reload your original OEM tune files rather than the "Stock" file(s) we provide, or it can occur when a tune file has been corrupted slightly, frequently by an email service. If you are able to re-download the file from your email, please try that. If that does not work, simply send an email in requesting your tune file for a $0536 error.
Error code of $0537. This either means that the PCM/ECM is locked or the configuration is incorrect. Please send in an email to us if you see this error for our diagnosis.
Plug the USB cable into your laptop and the flashscan device. Go to your start menu, then control panel. Click the "switch to classic view" link in the left pane, then click System. If you're using Vista, click the device manager link in the left window. If XP, go to the hardware tab, then click device manager. Look for the EFILive cable entry. Right click on it and select "Update Driver". When prompted, do not have windows search Windows update for a driver. Take the advanced option when offered and browse a specific location. Browse to C:\program files\EFILive\Drivers\EFILive\win-2k-xp-vista (or similar location) and click continue. If prompted regarding windows logo testing, click to continue anyway.
Once completed, the cable should be ready to use.
Click the "Check Firmware" button on the Scan and Tune home screen. If a firmware update is needed, the EFILive Control Panel will open up and you will be prompted with an "Update Firmware" button. Click it to proceed.
Show Example
To easily update that configuration, open the Scan and Tune program and click the BBX button. Press the "Read" button to retrieve the AutoCal's current configuration options, which will be re-used.
Next, click the down arrow attached to the Program button and select the "Format CONFIG File System" option. Once that process has completed, Press the Program button itself and press Yes when prompted to proceed.
Your AutoCal should now be fully updated.
If you see an "OPTIONS MISSING" message when you plug the AutoCal in, please refer to the Configuring AutoCal for logging and file retrieval step.